JOSM/Plugins/ImportImagePlugin
ImportImage Plugin transforms your images to the reference WGS84 geographic coordinate system, which is the default setting used by the JOSM Editor (JOSM meanwhile supports a large range of projections).
Description
This plugin allows to import spatial referenced images into JOSM from. It requires/supports:
- REQUIRED: the image file (Supported formats: GeoTiff, Tiff, jpg, bmp, png, gif)
- REQUIRED: a world file (<image_name>.wld (or other extensions like ".bpw" for BMP files, ".tfw" for Tiffs))
- OPTIONAL: a projection file (<image_name>.prj) with a WKT-representation of the source projection for this image
If no world file can be found, the plugin cannot continue. A world file can be created by gdal_translate when converting a supported file, eg.:
gdal_translate -co TFW=YES old.tiff new.tiff
the world file will be called new.tfw.
If no projection file can be found, the plugin asks to use the DEFAULT reference system, which can be set either in "<APP_DATA_DIR>/JOSM/plugins/ImportImagePlugin/pluginProperties.properties" file or in the layer-properties dialog after a layer is created.
Motivation
When we used JOSM, we wanted to underlay our GPS tracks with our images. But the CRS of the images was not WGS84, but Gauss-Krüger, so the images were not properly adjusted in the JOSM editor. We thought, that it would be a good addition to have a plugin, which would be able to transform images of various CRSs to WGS84 or any other CRS of JOSM, so that the GPS tracks and images match each other easily.
How to use
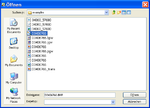
You can install it like any other plugin in JOSM. Update your pluginlist and select the ImportImage plugin. After clicking "OK", you need to restart JOSM and can begin your work. You start using the plugin with the option "Import Image" in the Imagery menu of JOSM. Select an image from your folder and click "Open".
Note, if you have a projection file (.prj), which defines the Reference System of your image, it needs to be in the same folder as the image itself.
In case you do not have a projection file or it is missing, you can use a default Coordinate Reference System. This means the plugin will use the default CRS as the Source Reference System of your image. After clicking "OK" your image will be transformed into the currently used CRS of JOSM upon the source of your chosen CRS.
Below you are going to see, how you can switch the default Coordinate Reference System to your liking.
After starting the ImportImage Plugin the first time the default is set to Gauss-Krüger zone 3 with the EPSG code 31467.
Properties
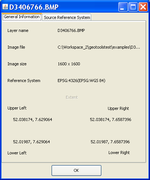
Once a layer is created you can open the layer properties dialog which contains two tabs:
General
Here you can see the properties of your image after the transformation. For example the image size, image name, file path, current CRS of JOSM and the coordinates of the imagecorners.
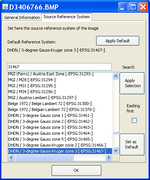
Reference System
The source CRS of your image is the one of your .prj file or the default one, if you have set the default CRS. This screen gives you the option to change the source CRS of your image manually.
Instead of scrolling through the huge load of CRS, you can use the search function to easily find the CRS you need. Putting in the EPSG number is most likely the fastest way to find the wanted CRS. After selecting your needed CRS you can set it as the default CRS.
Thats a good idea, if you want to add more images, which have the same EPSG code. Or you can select "Apply selection" to instantly transform your image into the currently used CRS of JOSM upon the new selected source CRS. Also, if the transformed image looks incorrect, although you have the right CRS, you should try selecting "Easting first" and "Apply Selection". This will swap the x and y coordinates of the source CRS and solve the problem.
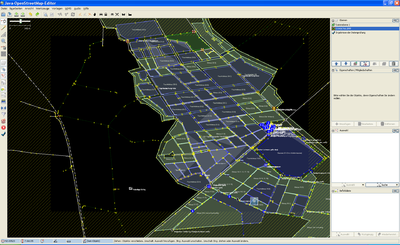
Result
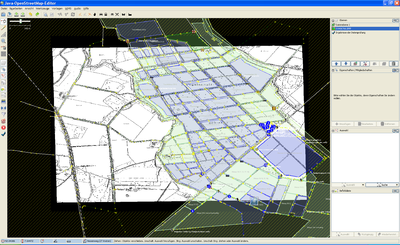
For a better understanding, here an example of how it might look like.
Notes
Note, that depending on which source CRS you choose, the transformed image will change. In many cases, if you choose a wrong CRS, the image itself wont be showing up in the JOSM Editor. If this happens, just choose another CRS and try again.
Also important, there are cases, where after you have imported your image, you only see the boundary of your image without content. If that has happened, the CRS of JOSM jumped to a "Pseudo Mercator" projection for yet unknown reasons.
To fix the display you click on -> Edit -> Settings -> map settings (3rd picture from above) -> projection method. There you change the projection method from "Mercator" to "WGS84 Geographic". After this you just need to resample your image in the "Source Reference System" menu of the ImportImage Plugin, for example with "Apply Default". Then it will be displayed properly.

