Ko:Using Imagery
When contributing to OpenStreetMap by tracing from aerial imagery — a kind of "armchair mapping" — be aware of outdated, warped or misplaced photos. Verified data is the better data to have. The most valuable kind of contribution involves mapping an area based on visiting an area and doing ground survey to gather data. Your local knowledge can contribute, but consider that "knowledge" itself can get outdated. The exact placement of roads and other features can be assisted by recording GPS tracks on the ground. Aerial images clearly provide useful assistance in the mapping process, but it can be a bad idea to move map objects created by others just to match them to aerial images. Aerial imagery may be distorted and shifted relative to real object locations.
Imagery and OSM
As a background layer within editors, we can use Bing, IRS, Landsat, and some others. All of these can be used to create and modify objects, but consider that each may have an offset or other kinds of distortions.
Initially, tiled imagery starts life as individual photos, taken from a satellite or airplane, tagged with a center coordinate (which itself is subject to errors, see below on GPS). The photo's corner coordinates can usually be derived from height-above-ground and lens properties. With that, special software can be used to transform it into a projection that is more commonly used with OSM map making. This transformation is not perfect, and may induce distortion and position errors.
Because there is, in any case (even if Earth was flat), perspective in the picture, objects may appear to skew to the side the higher above the ellipsoid they are, so this affects high-rise buildings, mountains, and roads going up/down hills. Perspective exists because the camera is only above one certain point at any time. The perspective problem can only be countered by taking more overhead pictures per distance, and combining them.
GPS tracks
GPS tracks, too, can have inaccuracies. As satellites pass overhead, your position may be trilaterated with improved or degraded accuracy over time. Limiting factors include weather conditions, atmospheric interference, suboptimal reception (dampening), reflections off objects (in particular, dense urban areas with high-rise buildings), obstructed sky view (when recording tracks from the inside of a vehicle), and the deliberately diluted accuracy for non-military users.
The result is that GPS tracks will frequently have an offset from reality. Whether the recorded data is better or worse than imagery is dependent on the particular area being observed. This GPS error may correct itself, or get worse through the duration of a long recorded track. All GPS devices give similar data and similar problems. Many GPS devices are capable of recording this error, culminating it in something called dilution of position (DOP), sometimes separated into horizontal and vertical components (HDOP/VDOP). GPS applications may also be showing it visually; the popular OsmAnd application draws a translucent blue circle for it around your marker.
While it is not necessarily better to rely on a GPS trace for accurate positioning, it can be more accurate than aerial imagery in some areas. A GPS trace may, in fact, be the only sensible data source in certain situations, such as when imagery only shows tree canopies of a forest without revealing the paths below, for example.
By recording several tracks, that is, going your route twice, three times, or more (perhaps even on different days), the track can be averaged out and may help identifying GPS traces with a bad initial fix. However, having too many tracks of the same roadway can make visual averaging harder by increasing the width of a spread.
Binding objects
Before adjusting aerial imagery, you need to choose certain "known" reference points, i.e. data points with known locations, or at the very least, locations with the least error. Such reference points might include:
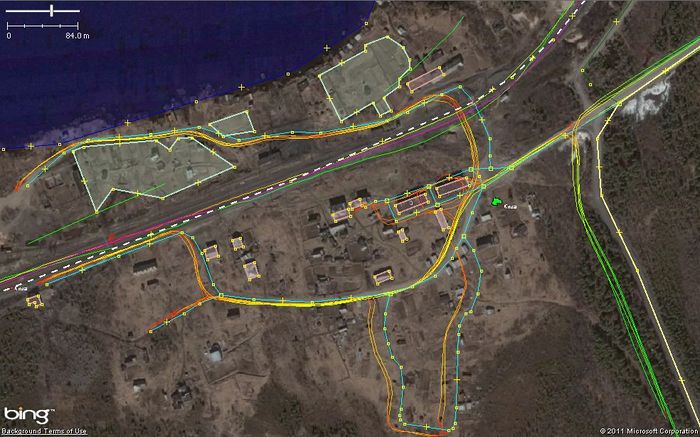
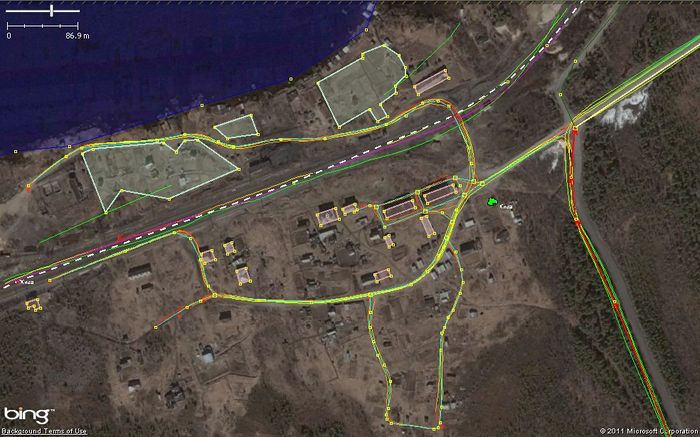
- GPS tracks. As explained above, GPS tracks can be imperfect and some tracks may suffer from great inaccuracy, especially if they were recorded in urban areas. Occasionally, you might also come across tracks that have been recorded using another coordinate system that is not compatible with OSM. In such cases, it is better to reference aerial imagery using an area with a high number of tracks (to reduce the average error). Warning: sometimes it's tempting to match GPS tracks and highway ramps, located above the ground, but you should always avoid doing that because off-nadir angle of view of satellite imagery makes any object located above the ground shifted differently from ground-level objects due to parallax. Always use ground-level objects for alignment.
- Known offset. Can be used in JOSM, where you can input into editor the value of offset. For some areas, you can find this value on a wiki or forum (example for Pskov region in Russia). Often, values are noted for use by groups of mappers and to save time for beginners. However, you need to take into account that offsets can be different even for single photos and, in some places, can dramatically change from block to block.
- Objects on the map. Can be used if you are sure that objects were placed correctly in the first place. For example, while mapping urban areas, first set imagery by matching general roads and tracks. Then check buildings similarly placed on the map and imagery. In the end, you can shift imagery a bit more for perfect matching.
- Objects on the imagery with known coordinates. If you know the accurate coordinates for some objects, you can use such objects for the image offset. Just match those objects on the map and bottom layer.
In any case, do not rush to move objects created by others! Make sure your offset is more accurate — or just contact the mapper. The mapper possibly used their own tracks but did not upload them to the server. Or, to the contrary, they used imagery with lower resolution. Start moving objects on the map if you are completely sure your offset is accurate.
Matching imagery using different editors
To edit OSM data, you can use different editors. Settings for bottom layers are similar in all editors. First download map and GPS data. Then turn on the bottom layer and shift imagery. Below is an explanation of how to do it with different editors:
iD
- Press 'b' when editor is open (or click icon with layers)
- Then click text "Fix alignment"
- You will see four arrows to allow you to shift the imagery around.
The imagery offset is not stored between sessions
Vespucci
Will use data from Imagery Offset Database.
Potlatch
To download all GPS data around mapping area, press «G» for Potlatch 1, or button «GPS Data» for Potlatch 2. You will probably not use the first version of the editor. It is not able to handle Bing imagery. However, you can change the bottom layer using the menu «Background». Hold «space» and move the imagery until tracks or map objects will be matched depending on your favourite method.
JOSM
With Imagery Offset Database plugin
Without plugins
To download GPS tracks, tick «Raw GPS data» at «Download» window. After downloading, an additional layer «Downloaded GPX data» will appear. You can then add the imagery layer using the «Imagery» menu. While mapping, you can hide the layer «Downloaded GPX data» if it interferes.
To offset imagery, click the right mouse button at the imagery layer or, in the menu «Imagery», open «New offset», or use imagery adjust button in toolbar: ![]()
If you know offset values, you can enter them, or move picture (using mouse or keyboard) until tracks or map objects will be matched depending on your favourite method. With the opened window, you can look around an area to check if the offset is similar. After mapping, you can bookmark the offset inputting name for future use.
Other examples: JOSM_offset_images.
Merkaartor
Authors never use this editor, but it is known that you can offset imagery similarly to Potlatch by holding «space» button.
After the offset has been specified, you can start editing, but remember to move away from the initial area, and keep checking offset and to move the imagery again if necessary.
Frequent mistakes
Server-side offset databases
Active
- Imagery Offset Database — free database, API and widely used JOSM plugin
Inactive
There have been a number of ideas for approaches to allow experienced users to share offsets, storing them on the server and perhaps even applying the corrections automatically within the editors.
The Russian IRS layer has undergone a process discussed on the forum : https://forum.openstreetmap.org/viewtopic.php?id=6817
The True Offset Process was a project/discussion on something similar for any imagery, but particularly bing.


