Eastern DRC & Western Uganda Maxar-Ecopia Buildings Import/Workflow
| Main page | Workflow | ||||||||||||||||||||||||||||||||||||||||
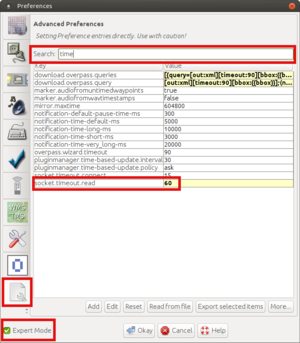
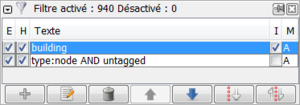
Quick ReferenceWhat we needa) Have a dedicated import account. b) Have JOSM Remote control enabled. c) Have utilsplugin2, todo, conflation and buildings_tools JOSM plugins installed. d) To avoid a timeout error while retrieving the data from the Tasking Manager, change the JOSM socket.timeout.read option to 90. e) Have the following filters ready:
Steps1) Choose a task and load the OSM data, the custom imagery and the Maxar-Ecopia buildings into JOSM. 2) Correct any significant offset between the existing OSM data and the Maxar imagery and data. 3a) If the selected tile contains at least one existing building in the OSM layer, configure the Conflation plugin. Then generate matches between the existing OSM data and the Maxar-Ecopia (AI) layer. 3b) If there is no existing building in OSM, simply merge the Maxar-Ecopia layer with the OSM one. Then, using filters, select all buildings in the data layer and add them to the Todo list, so we don't leave any building behind. 4) Then, deactivate all filters and go building after building through each of the 3 lists of the conflation plugin, or through the Todo list depending on the case:
5) When finished, upload the data with the specific import OSM user account and the specific changeset tags:
where NUMBEROFPROJECT is the Tasking Manager project number. You are ready to start a new task. If you want to leave it here, don't forget to switch back to your REGULAR OSM ACCOUNT now, to avoid using it for purposes other than importing data into OSM! 6) If appropriate, manually trace missing buildings. If you are doing this simultaneously with Step 4, consider using a separate layer for the buildings which you are manually tracing. 7) Then upload any manually traced buildings into OSM with your regular OSM account using the following changesets tags :
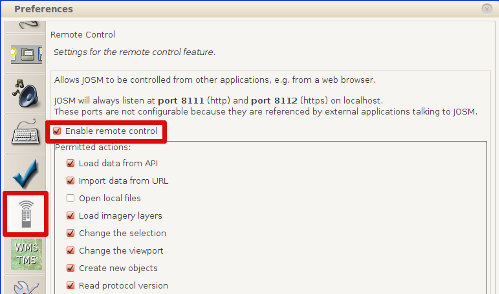
Before you actually start with any taska) You need to create one specific import OSM user account for this import (if you don't have one yet). For example, if your regular OSM account is doejohn, you can create one named doejohn_imports. You will need a different email account than the one you used to create your regular user account. Hint: If you have a Google Mail account for your regular OSM account, you can open an import account putting dots in the email user. For example: johndoe@gmail.com is equivalent to john.doe@gmail.com or j.ohn.doe@gmail.com. b) Open JOSM and check that you have enabled the Enable remote control option in the JOSM preferences (F12): c) Install the following JOSM plugins (if you don't have them installed yet): c.1) Utilsplugin2 c.2) Todo (list) c.3) Conflation c.4) Buildings tool (recommanded) d) To avoid a timeout error while retrieving the data from the Tasking Manager, change the JOSM socket.timeout.read option to 90. To do that:
e) We will have the following useful filters ready to work with the data:
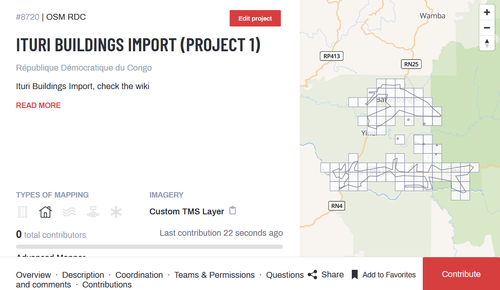
Workflow stepsGetting OSM data and Maxar Ecopia building footprints1) Open JOSM editor. 2) Select one unfinished project from the following list of HOT Tasking Manager projects for this import:
*These two tasks are currently available solely for testing the import workflow, no data should be uploaded to OSM until discussions on mailing lists are not finalized. 3) Click on Contribute:
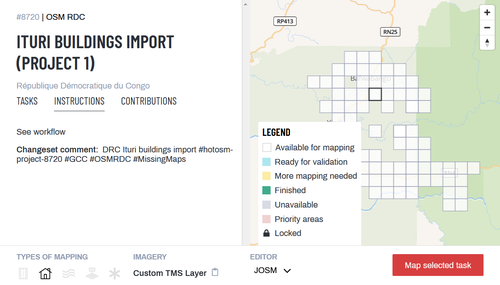
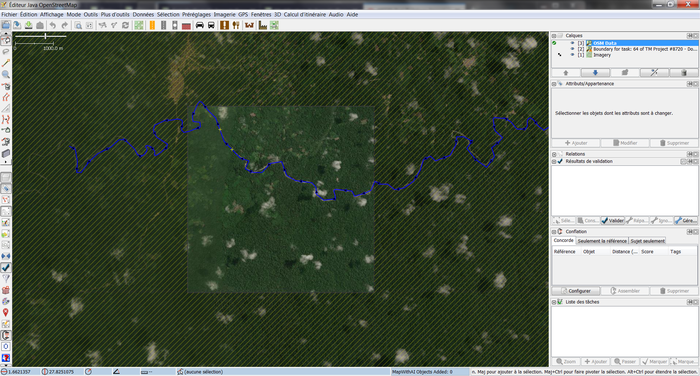
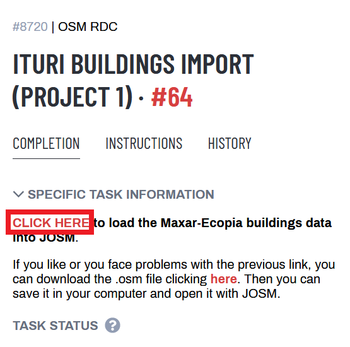
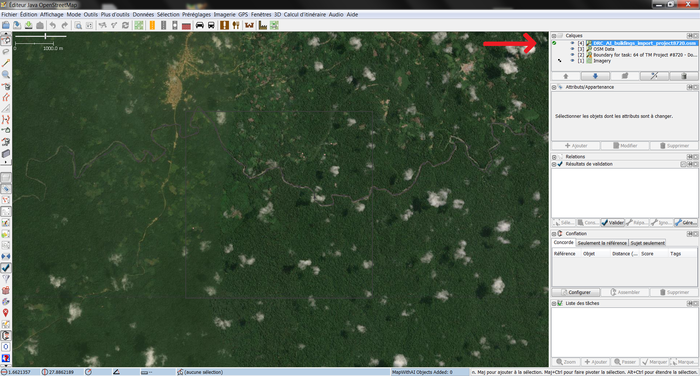
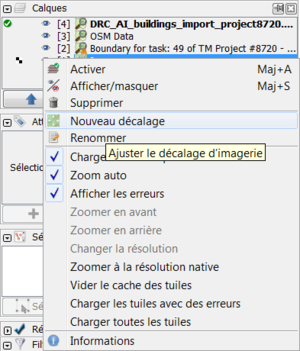
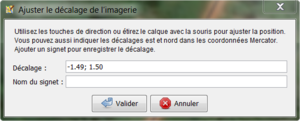
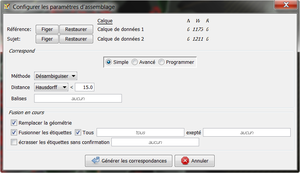
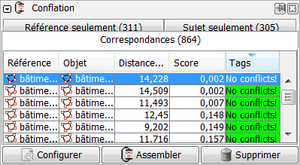
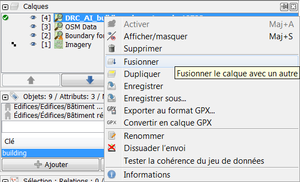
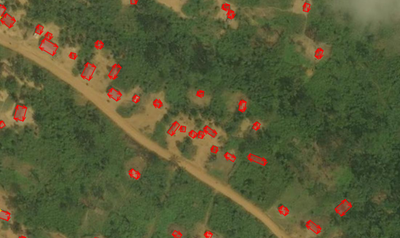
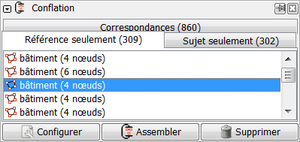
... and you will download both the OSM data for that task area into one layer of the JOSM editor called OSM Data (or similar) and the custom imagery layer: 5) We will now download the Maxar-Ecopia building footprints for that same area. Go to Extra Instructions and click in the CLICK HERE link to load the Maxar-Ecopia data into JOSM: The Maxar-Ecopia building footprints will be loaded in a new data layer, called ***_AI_buildings_import_projectXXXX.osm (where *** = DRC or UGA and XXXX = number of import project): Preparing the dataCorrecting imagery and Maxar-Ecopia offsetSince the Maxar-Ecopia building footprints have been extracted from the custom imagery layer associated with the task, these 2 layers are perfectly aligned. However in some areas, especially neighborhoods in which many buildings had already been digitized in previous years, an offset can be visible between the existing OSM data and these 2 layers. If this situation arises, consider to realign both the custom imagery and the Maxar-Ecopia building layer with the existing data. Realigning the imagery layerTo align the imagery with the OSM layer, right click on the imagery layer, choose New offset, and gently shift the imagery until it is aligned with the existing OSM objects. Then click on Validate. Realigning the AI buildings layerTo align the Maxar-Ecopia buildings footprints, select all the data (Ctrl-A) and shift it manually to align it with the realigned imagery layer. If there is at least one existing building in the OSM layerConfiguration of the conflation plugin1) Select all the objects in the AI (Maxar-Ecopia) layer using the following filters, so that only the edge of each building footprint is selected. 2) While your AI layer is active, start configuring the Conflation plugin, clicking on Configure in the plugin panel. 3) Click on Freeze on the Reference line, the number of frozen objects appear. 4) Activate the OSM layer and select all the existing buildings in that layer using the same 2 filters as earlier. 5) In the conflation window, then Freeze the object layer (while the OSM layer is still the active one), the number of existing buildings selected will appear. 6) Check the other configuration parameters in the conflation window, the process can work with the default values. However, to avoid building "jumps" matching buildings which should not be matched, especially in areas where the existing buildings carry more information than building=yes, use Hausdorff distance calculation and reduce the value to 15. Make sure the box in front of Replace geometry is checked as in the image below. Generating matches7) Click on Generate matches to close the conflation configuration window. The conflation panel now shows 3 tabs:
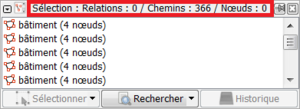
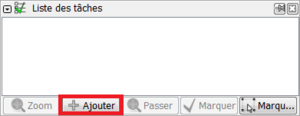
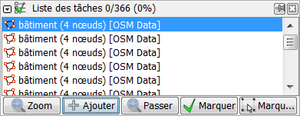
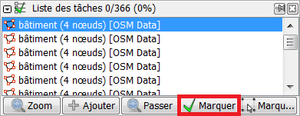
Each building from either the Maxar-Ecopia (AI) or the OSM layer is now listed under one of these 3 tabs. If there is no existing building in the OSM layerMerging Maxar-Ecopia layer with the OSM oneTo merge the Maxar-Ecopia (AI) layer with the existing OSM data: right-click on the AI layer and click on Merge. Adding the buildings to the Todo listSo to make sure that we don't leave any building behind, we are putting all the buildings inside the Todo list plugin window. In order to do this, we will make sure the JOSM filters are activated as follows: And we select all buildings (you can do that with the Ctrl+A shortcut): In this case, we can see that we have 366 buildings selected, and not their nodes: Now we can add the ways to the Todo list. Just go to the Todo list window, click on the Add button: and you will see that the 366 buildings are added to the list: Now we are ready to work with each building. Working with the dataVERY IMPORTANT: Before continuing, disable all JOSM filters. Considering how dynamic buildings removal/rebuild is in the region, in particular with houses built in natural materials, which are often replaced every few years, we suggest to include in our review all the existing buildings. All the buildings that are going to be added or updated through this import will therefore be reviewed at one step or another of this workflow. Depending on the existence or absence of buildings in OSM for your tile, you are now finding yourself with either 3 lists of buildings within the Conflation plugin panel or one single list in the Todo list panel. You are now going to review each of them individually. In the case of the todo list plugin, the aspects to be considered are listed under Adding a new object (Conflation/Reference only & To do list) subsection. If the case of the conflation plugin lists, we will have the ability to choose between a conflation and a removal of each object in the list, various potential cases are detailed under the 3 following subsections. Updating an existing object (Conflation/Matches)The matches are buildings identified in both OSM and Maxar-Ecopia layers. If there are any matches listed, you can review and visualize them on the map. We can check if the matches identified by the conflation plugin are consistent with our observations on the imagery and if their geometry got improved. When a conflation is made based on matches, each of the existing objects will keep its history in the OSM database while receiving updated geometry and tags from the AI layer, in a similar way as if we would have been using the Replace geometry tool, except that this is done here for multiple buildings at a time.
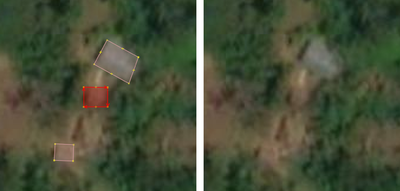
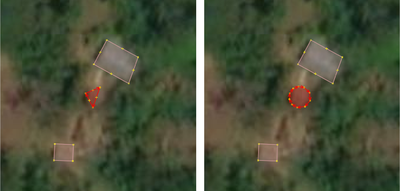
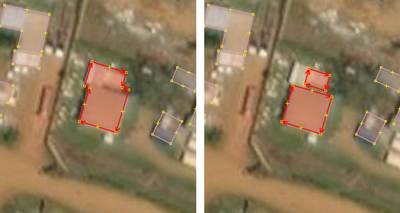
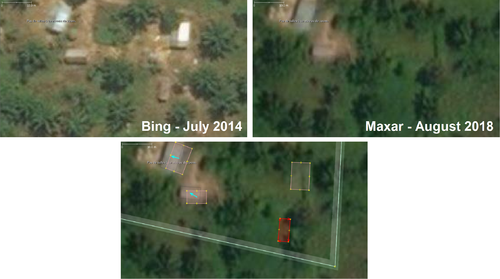
The Maxar-Ecopia footprint doesn't add any valueIf the Maxar-Ecopia version of the building doesn't bring any significant improvement, click on the Remove button to remove this footprint from the list. Alternatively, the object can be deleted from the Maxar-Ecopia (AI) layer. The Maxar-Ecopia footprint improves the geometryIf the Maxar-Ecopia version of the building has a better geometry, merge the 2 buildings by clicking on the Conflate button while the building is selected in the list. The former geometry of the object is therefore replaced by the Maxar-Ecopia one in the OSM layer. If a tag related conflict is detected in the matches list, it will pop up during the conflation and you will need to arbitrate between tags to solve the conflict. If it is not solved, the conflation of the involved buildings won't happen. In most cases, keeping the pre-existing tag will be preferred. However, if a building previously tagged as construction based on imagery now appears completed, its tag can for instance be switched to building=yes. Adding a new object (Conflation/Reference only & To do list)The buildings listed under Reference only or in the todo list are new buildings coming from Maxar-Ecopia and for which there is no equivalent object in OSM. We are going to review each of them to check if each footprint can be identified on the imagery and if its shape has been correctly delineated. If it's effectively the case, the object will be added to OSM. If not, the footprint will be respectively deleted or manually corrected. The Maxar-Ecopia footprint isn't matching a buildingAn object has been incorrectly interpretated as a building by the Maxar-Ecopia methodology. It is a "false positive", they are relatively scarce. We delete it from our layer. In the case of the todo list, the building has already been added to the OSM layer, you will therefore need to select it clicking on its edge, before deleting it clicking on Delete. In the case of the Conflation plugin, since the object hasn't been added yet to the OSM layer, you can simply remove it from the "Reference only" list, by clicking on the Remove button, inside the Conflation panel. Alternatively, the object can be deleted from the Maxar-Ecopia data layer. The building shape is incorrectWrong shape interpretationIn some cases, we may see that the Maxar-Ecopia building footprint was correctly detected but that its geometry had been wrongly interpreted as a square instead of a circle. We may correct it. One example of Maxar-Ecopia building interpreted with a wrong shape. 1) To correct it you can delete extra nodes, keeping only 2 to 3 nodes located on the edge of the circular building. 2) Select the way and click Shift-O and the way will be given a new round shape while its tagging stays unchanged.. In other cases, a building partially covered by some vegetation can come up with a trapezoidal shape instead of a rectangle. In this case, it will be necessary to square it. 1) Move an existing node to the position where you expect it should be (where the building ends, under the vegetation). 2) Select the edge of the building, then click on Q and the building will be squared without affecting any of its other propoerties. Shape including several buildingsSometimes, especially in urban or dense areas, several close buildings can be interpreted as a single big building. They might need to be separated or retraced separately. Building footprints are connected to each other1) Separate the buildings connected to each other using the shortcut G after having selected on the building you wanted to disconnect from the others. 2) Then reposition their nodes in order to avoid any overlap and square any building which would require it (with Q shortcut). The Maxar-Ecopia footprint is correctThe Maxar-Ecopia footprint effectively matches a building on the imagery and its shape had been correctly interpretated or corrected. This one can be added to OSM. In the case of the todo list, we will simply mark the object as completed clicking on the Mark button an the plugin will automatically bring us to the next object in the list. In the case of the Conflation plugin, we will click on the Conflate button to merge the verified object with the OSM layer and we can then select the next object in the list. Checking an existing building (Conflation/Subject only)All the existing objects in OSM for which the Conflation plugin hasn't identified a match in the Maxar-Ecopia layer can be found in the Subject only list. Several reasons can explain this. We will go through each of the buildings listed under the Subject only tab individually. Double-clicking on a building in the list will get JOSM zooming on the selected one. After a visual check, decide if the building should be deleted or kept. Imagery can't be usedIf the imagery associated to the project is cloudy in the area, it is possible that the cloud cover hides buildings. In this case, we will ignore the objects involved without modifying them, keeping them as they are in OSM. Building doesn't exist anymoreA building which previously existed in OSM doesn't appear anymore on the imagery. We check the object history (Ctrl-H) to make sure it was created from an older source than the project imagery. If this is not obvious, or that clouds or tree cover affect the visibility, don't delete the building but add a fixme tag on it for further check. If it is obvious that the building was created from an older source (for instance Bing imagery), that it doesn't exist anymore and that it doesn't include any additional valuable tags or reference points, delete it. In the below example, the 2 buildings on the right side of the imagery were digitized based on an older satellite image. As a more recent source shows that these buildings have disappeared, they will both be deleted from the database.
The building existsIn the case the Maxar-Ecopia layer does not contain any match for an object existing in OSM and visible on the imagery layer associated to the project, maintain the original object in OSM. Correcting visible overlapsNew buildings may have been built on former roads or paths. Using the imagery correct the visible objects to avoid having overlaps. JOSM validation tool can help you detect such type of situation, classifying them as warnings. Optional: Tracing additional missing buildingsSome buildings might have been missed by the algorithm. In most cases, they will be scarce and can be manually traced using the Buildings plugin and the imagery associated to the project. In case of cloud cover on the imagery associated to the project, in an area which hasn't been mapped yet, it is possible to use another, even older, satellite imagery to digitize the missing buildings. ATTENTION, in all cases, this digitization should take place in an editing session separate from the import one.
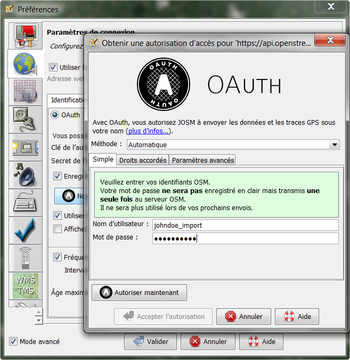
This distinction is important because this type of edit doesn't require using an import account, it will need to be uploaded using your regular OSM account (instead of the one dedicated to imports), because the involved objects are not coming from an external source. The caracteristics of the upload are detailed at the end of this page. Upload new data to OSMUpload import dataOnce we are done with the review of all the building footprints contained in our list(s), we will upload the data to OSM. 1) As we will import these data with the dedicated OSM import account, we need to make sure we changed the user in the preferences (F12): 2) We click on the Upload button. We correct any errors/warnings we may have, and then we only have to set the following changeset tags: Tag automatically added by the Tasking Manager:
where NUMBEROFPROJECT is the Tasking Manager project number. Tags to be updated or added manually:
Example: And now we (finally!) upload the data. You may now proceed with another task. In case you don't want to continue for now, DON'T FORGET TO GO TO JOSM PREFERENCES (F12) AND SWITCH BACK TO YOUR REGULAR OSM USER ACCOUNT. If it's not immediately disconnected, it is quite common to leave the import user account active and go mapping other things that you should map with your regular OSM user account. Optional: Upload additional objectsIf you have manually traced a significant number of additional buildings, you will have to upload them to OSM with your regular OSM account. Make sure your OSM account dedicated to imports has been disconnected. Then upload your manually traced buildings to OSM with your regular OSM account using the following changeset tags: |
|||||||||||||||||||||||||||||||||||||||||
