JOSM/Plugins/KartaView
The KartaView plugin is a JOSM plugin that displays up to date street view images collected by the KartaView platform. Street view images are also available via the KartaView web and mobile applications. Having an extra source of free and open imagery ease the process of remote mapping and allows the users to reflect the reality also in the map. Street view images are helpful for editing map features that are not visible on satellite imagery like traffic signs, house numbers, bus stops, points of interests.
Since version 144, the plugin introduced a new feature that displays street sign detections and allows their manipulation.
Installation
Install the KartaView plugin the familiar way, through the JOSM plugin Preferences menu item.
Using the plugin
After installing the plugin and restarting JOSM, the layers and dialogs windows associated with the KartaView plugin need to be enabled manually. The layers can be enabled from JOSM -> KartaView->KartaView menu item and JOSM -> KartaView->Edge data, while the panels from the left side KartaView detection ( ![]() ), Edge data (
), Edge data (![]() ) and KartaView (
) and KartaView ( ![]() ) menu items.
) menu items.
The plugin saves the open/closed state of the layer and panel. So if you delete the layer/panel then the next JOSM session will not load the deleted layer/panel by default. A previously deleted KartaView/Edge layer and panel needs to be activated manually.
KartaView layer
The KartaView layer loads data automatically: in the case when other Imagery layers are opened the data is loaded as the map is moved, zoomed in or out. In the case when other OSM data layers are opened the data is loaded only for the downloaded area.
Map View
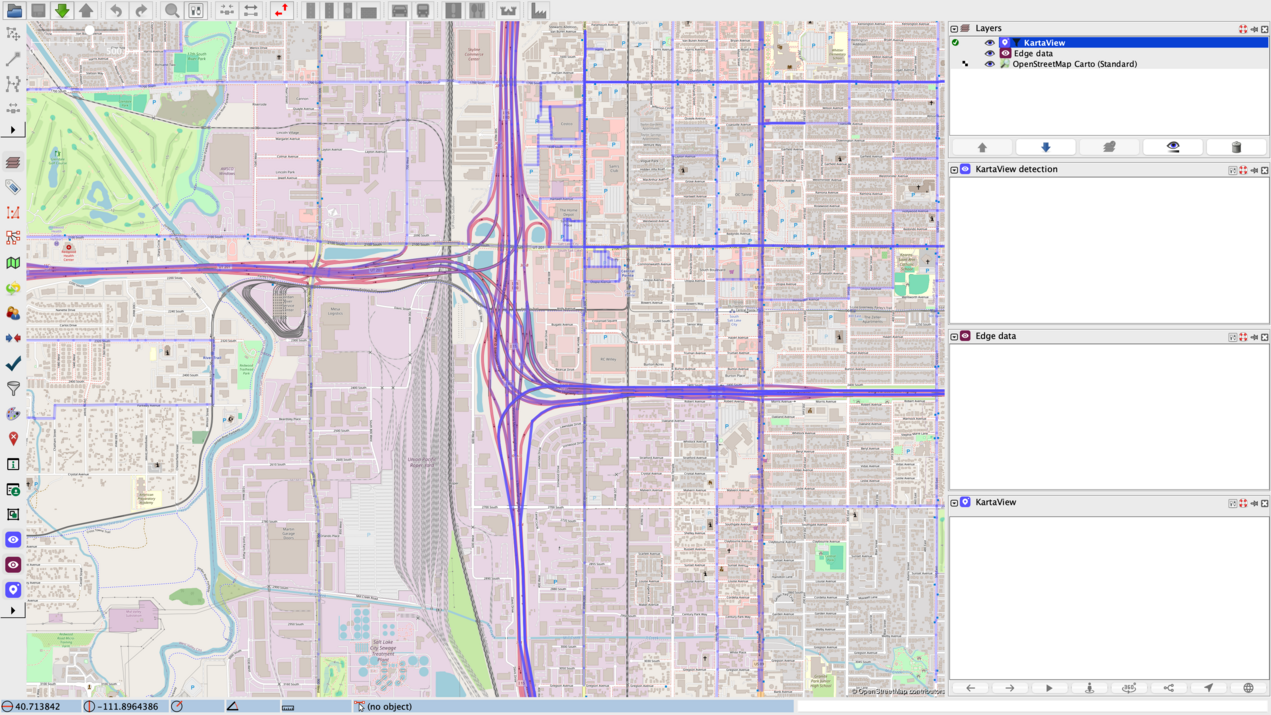
The KartaView layer automatically downloads data depending on the context: data update is synchronised with map movements, such as panning or zooming, when Imagery layers are active. Conversely, with OSM data layers open, it only uploads data for the area that has been downloaded. Starting with zoom level 14, the layer indicates areas that have street view coverage giving the user a hint where he/she can find an extra source of mapping support:
Ways are coloured with purple and have different transparency based on the data coverage: segments that have many images are opaque, while segments that have only a few images are more transparent.
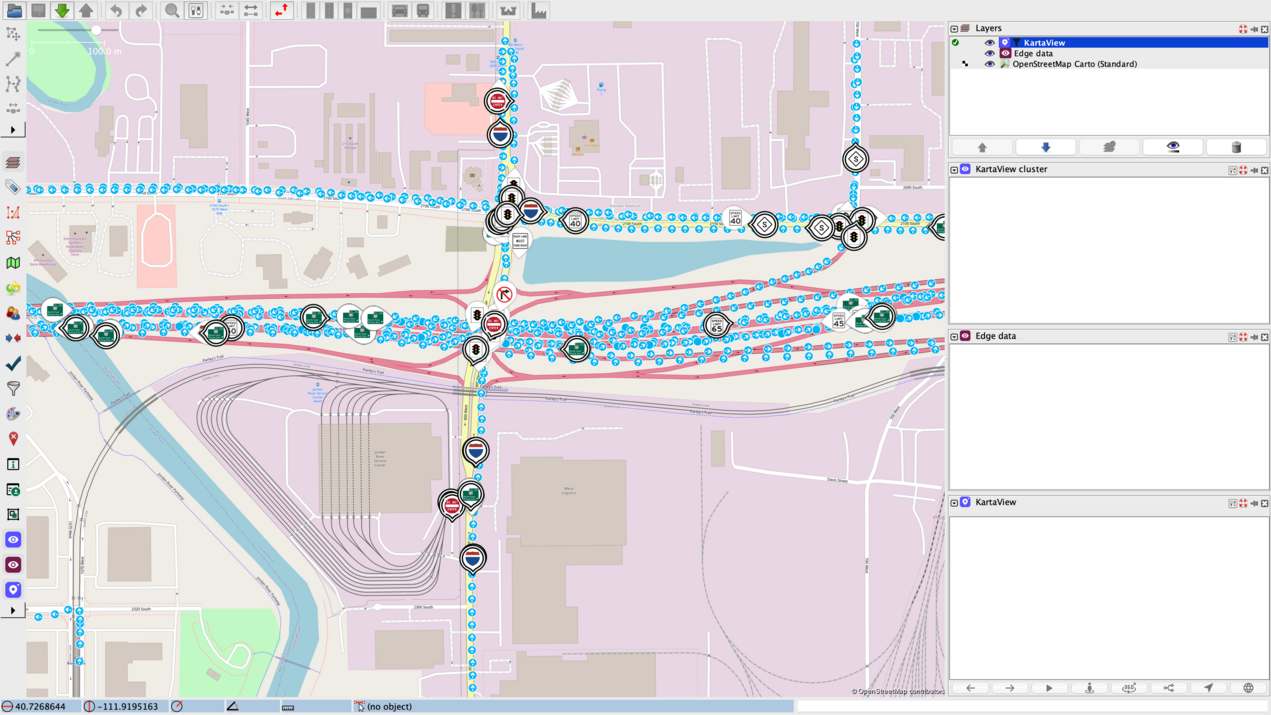
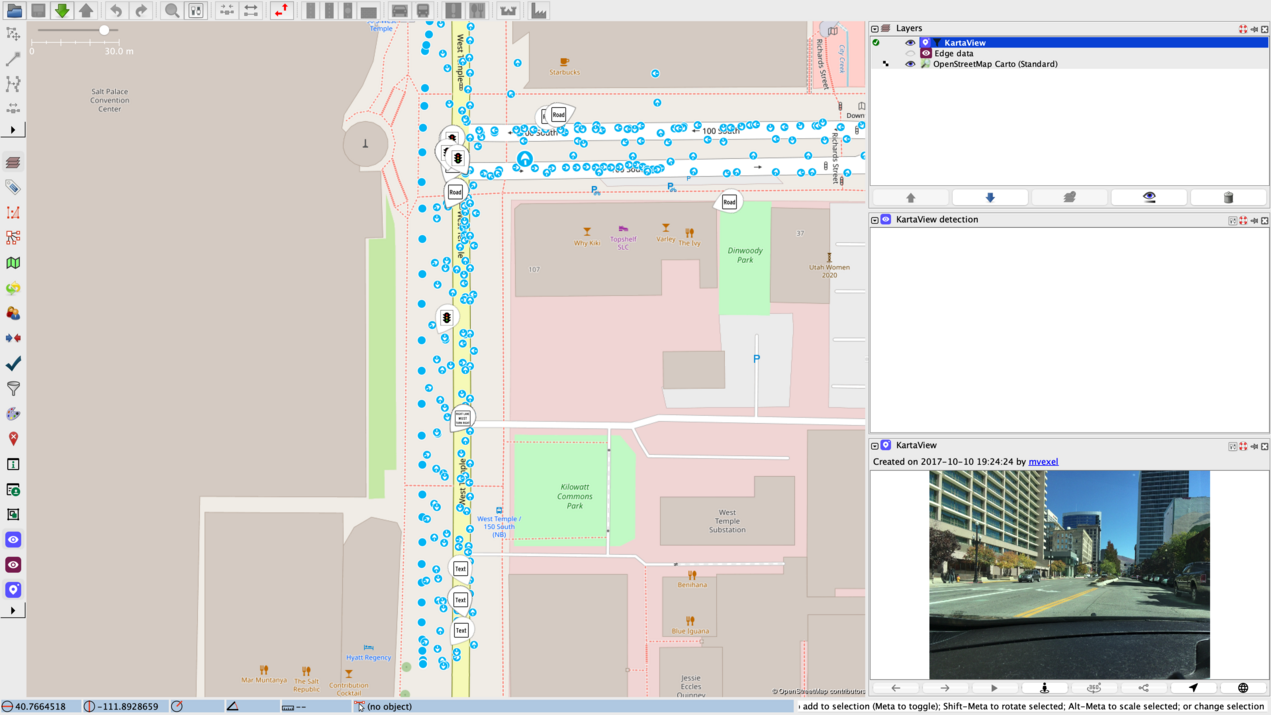
Starting with zoom level 17 the map view changes and individual photo locations, sign detections and aggregated detections are displayed:
Each photo location is illustrated by a blue icon with a white arrow that indicates the heading. Images that have no heading information are represented by a blue circle.
Sign detections are represented using self-describing icons. Sign detections and clusters need to be enabled from Filter, by checking Detections /Clusters under Data to display.
Image selection
As long as the KartaView layer is visible, users can select an image location with a single click of the mouse. Image selection is possible even when the KartaView layer is not the currently active layer.
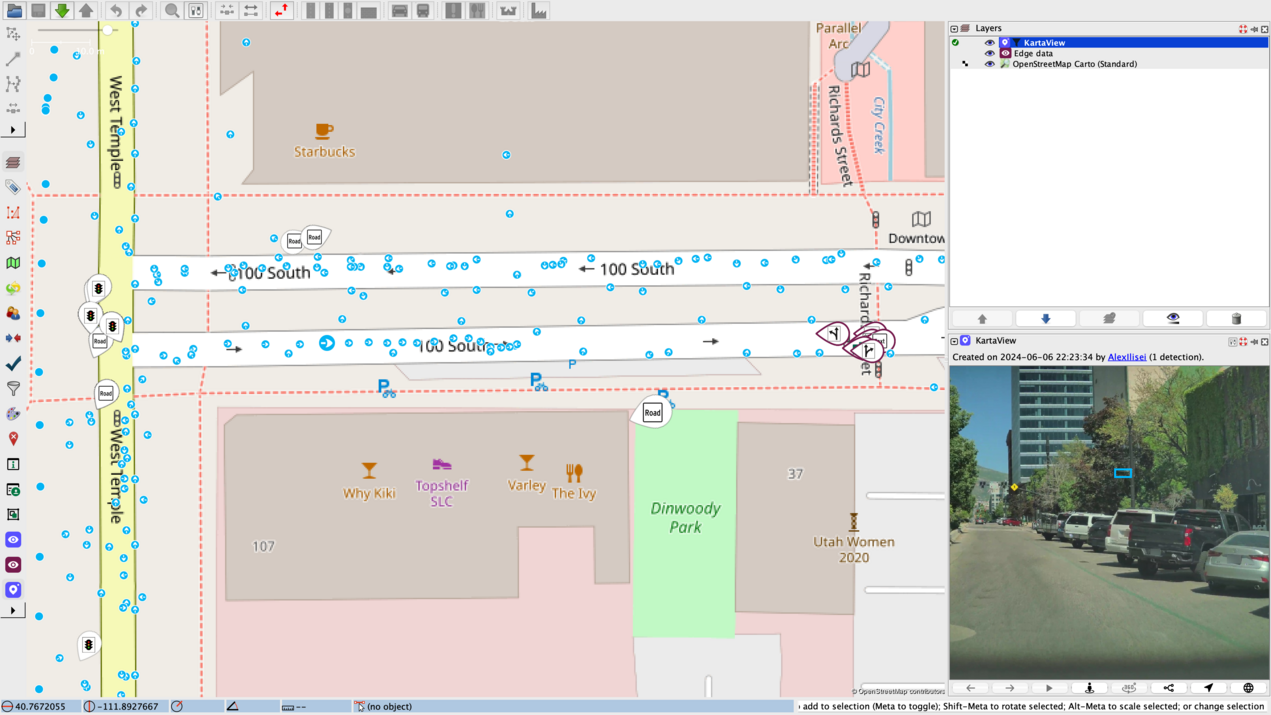
A selected image is highlighted on the map (bigger icon) and its content is displayed in the right side KartaView panel (more information regarding the panel at KartaView panel section).
Track visualization
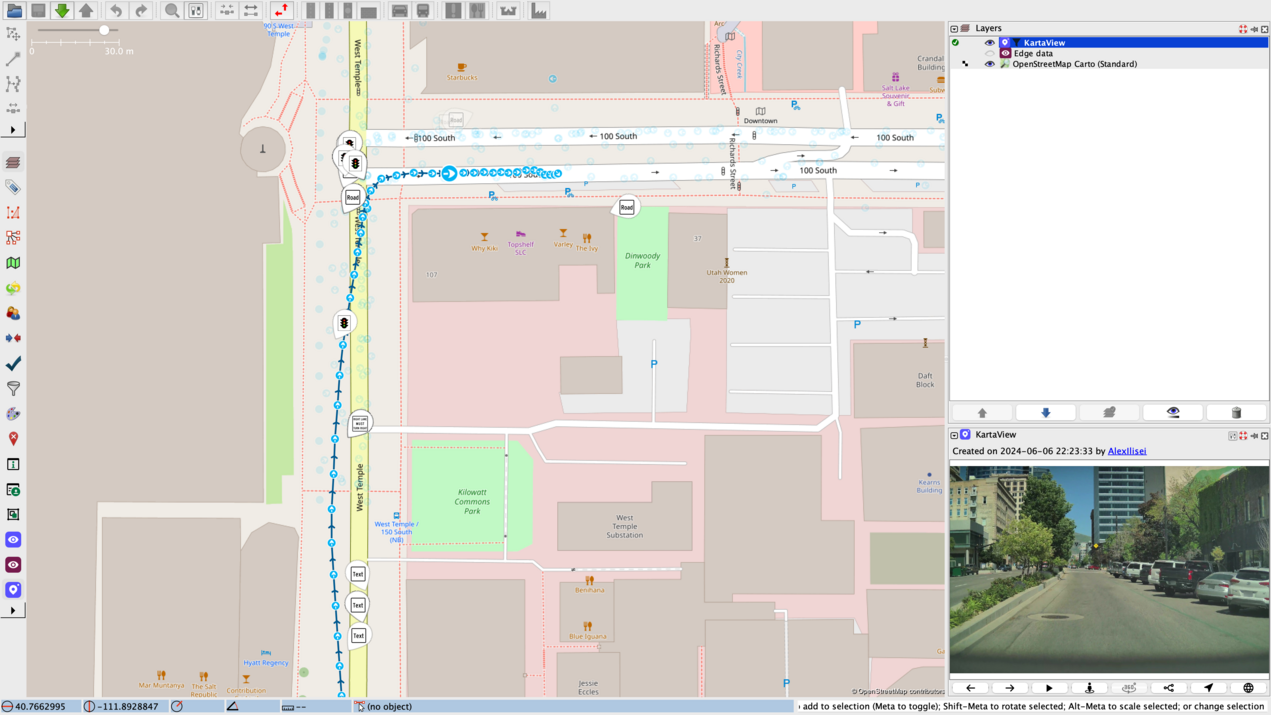
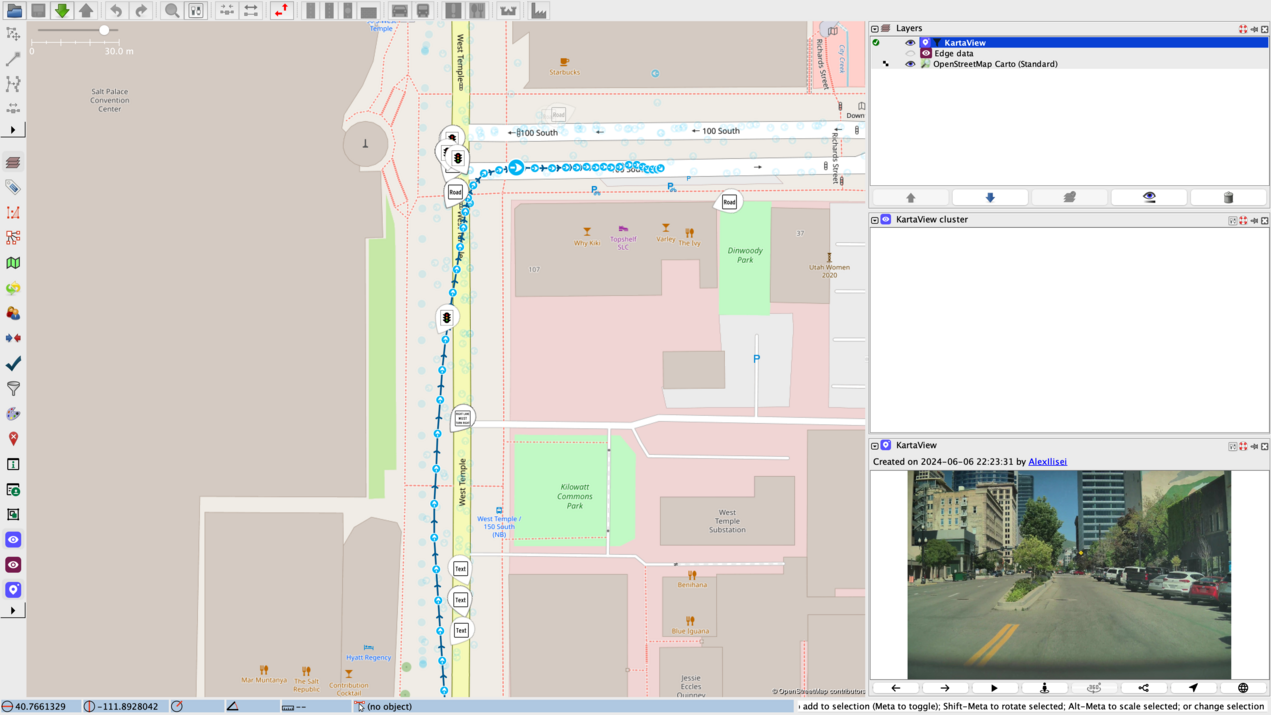
The tracks corresponding to a selected image is displayed if the "Load track on image selection" option is enabled from Preference settings. A KartaView track is illustrated with a blue directed line. Images belonging to the selected track are illustrated with opaque icons; while other images along the track are illustrated with transparent icons.
Data filtering
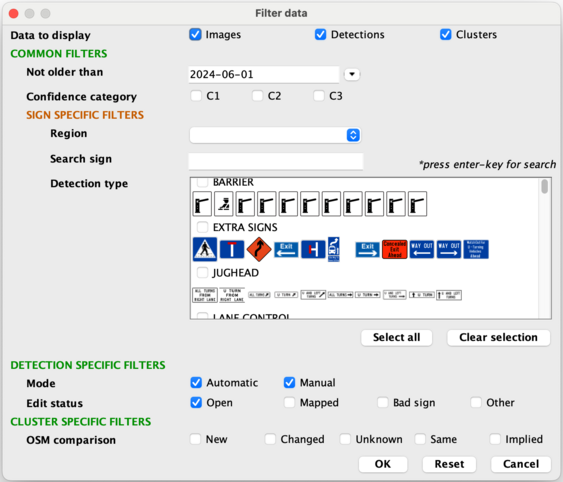
The displayed data can be filtered based on multiple criteria. Filters can be accessed by right clicking on KartaView layer -> Filter data menu item.
You can filter the sign detections by the following criteria:
- Data to display: the types of data which can be visualised in the map (Images, Detections, Clusters)
COMMON FILTERS
- Not older than — show data from that date or newer until the current day.
- Confidence category — the value (C1, C2, or C3) which the data should have
- SIGN SPECIFIC FILTERS
- Region — show detection and cluster types corresponding for a region
- Search sign — the desired sign to find
- Detection type — a list of all available detection types
DETECTION SPECIFIC FILTERS
- mode — show only automatic detections, manually detections, or both
- edit status — show detections based on their status (Open, Mapped, Bad sign, Other)
CLUSTER SPECIFIC FILTERS
- OSM comparison — show detections based on comparison with OSM data (New, Changed, Unknown, Same, Implied)
KartaView panel
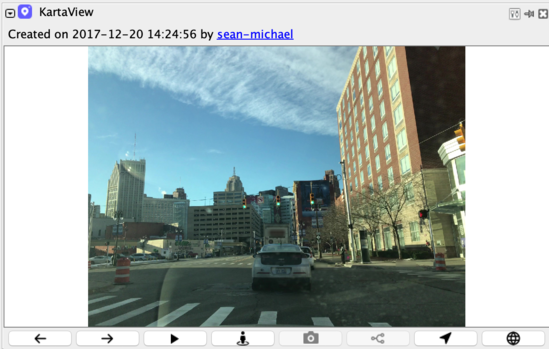
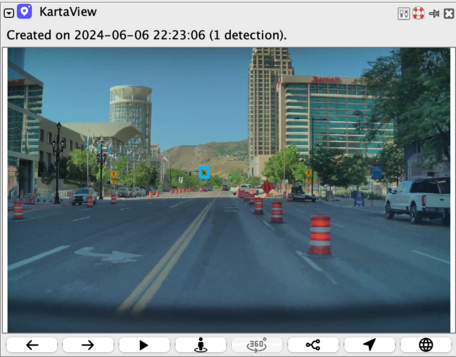
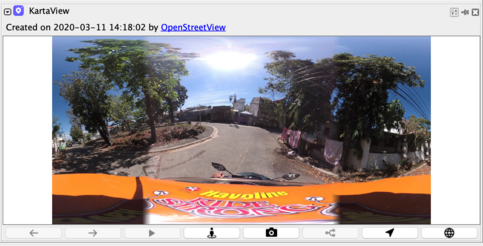
The KartaView panel displays the currently selected image, along with basic information such as: date of upload, username of the user who uploaded the image and the number of detections found in it. In the majority of the cases the username represents the user's OSM username, but in some cases it might be also a Facebook or Google username ( since the KartaView platform allows the user to sign in also using a Facebook/Google account).
A KartaView image can be zoomed in and out using the mouse wheel. In an already zoomed in image details can be observed by moving the image left, right, up and down.
The panel also has a number of action buttons on the bottom. These are for previous image/next image/play track/nearby photo loading, switch image format to 360 degrees, download matched OSM way, centering the map to the selected image location and opening the image web page. These features are described in the next sections.
KartaView detection panel
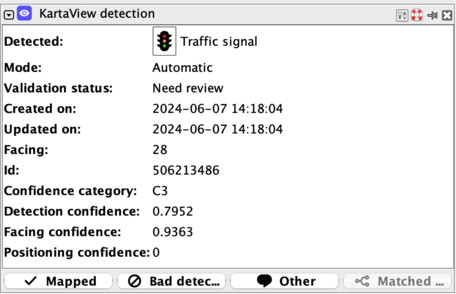
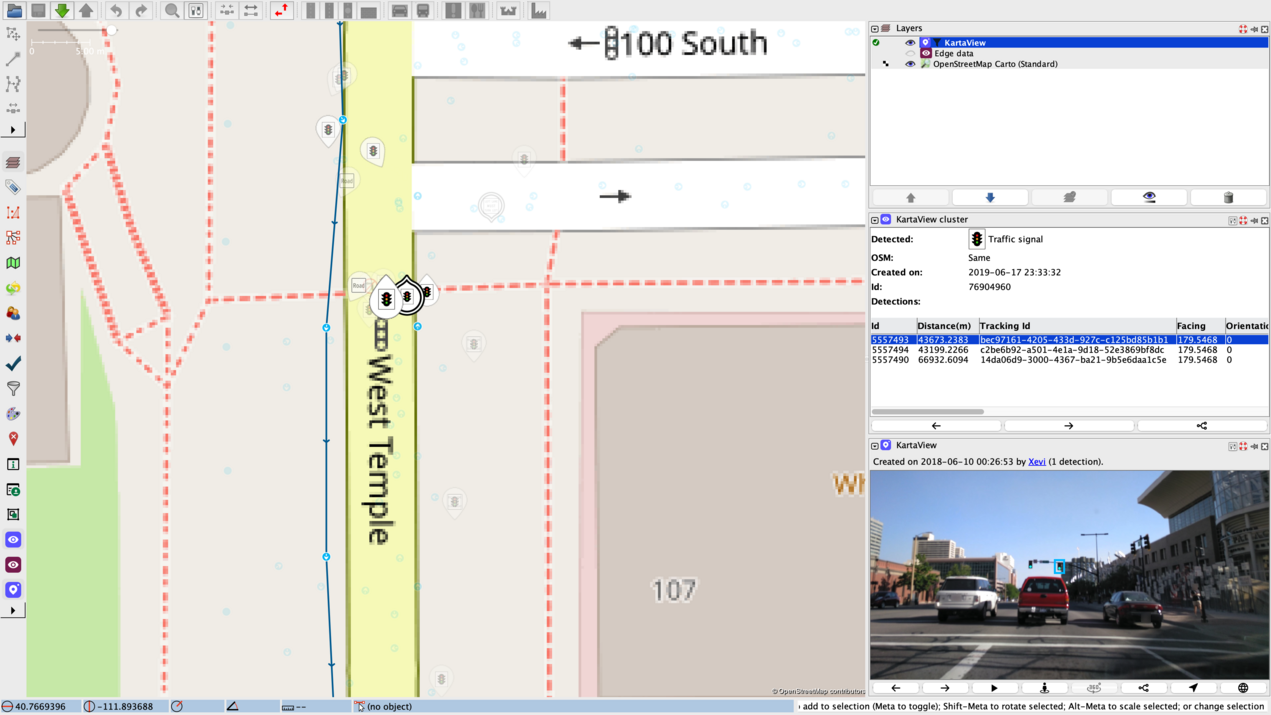
When selecting a detection, the corresponding photo is loaded and the sign metadata is displayed in the KartaView detection panel along with the option to set the status to Mapped, Bad Detection, or Other. By marking signs that are not detected correctly as Bad Detection, you hide them from other mappers, and the information will be used to improve the detection system.
When an aggregated detection is selected, all its detections are shown in the table and a photo with the first detection from the table is loaded.
All detections which belong to a selected aggregated detection are purple coloured. If you want to iterate throughout them you can do the following:
- use the up or down arrows from the keyboard
- use the left or right arrows from the table's panel
- click on the detection from the table by using the mouse
Next and previous image functionality
The next and previous image actions are available only if the track corresponding to the selected image is also displayed.
Next image can be loaded either by clicking on the "Next button (![]() )" from the KartaView panel or by pressing Alt+Right arrow keys. Similarly the previous image can be loaded either by clicking on the "Previous button (
)" from the KartaView panel or by pressing Alt+Right arrow keys. Similarly the previous image can be loaded either by clicking on the "Previous button (![]() )" from the KartaView panel or by pressing Alt+Left arrow keys.
If the next or previous image is not visible in the current view, then the map is moved automatically and images near the track are downloaded.
)" from the KartaView panel or by pressing Alt+Left arrow keys.
If the next or previous image is not visible in the current view, then the map is moved automatically and images near the track are downloaded.
Play Track
Clicking on ![]() starts the play track feature. This will continue to load the next photo on the selected track until
starts the play track feature. This will continue to load the next photo on the selected track until ![]() is pressed or until the last photo is reached. The length of the played track can also be configured from Preferences, under Autoplay settings, by giving Track length in meters a value. After the given number of meters was reached, the auto play stops automatically.
is pressed or until the last photo is reached. The length of the played track can also be configured from Preferences, under Autoplay settings, by giving Track length in meters a value. After the given number of meters was reached, the auto play stops automatically.
Nearby image
This functionality loads images that are located near to the selected image. This functionality improves the mapping process especially if the selected photo does not contain all the information or if the selected photo has bad quality or has not the right angle.
A nearby photo of a selected photo can be visualised by clicking on the "Nearby photo" icon (![]() ).
).
If the "Load track on image selection" preference settings option is selected , then also the track corresponding to the nearby photo is loaded.
Download matched OSM way
The OSM way on which the photo was taken can be downloaded in a new OSM Data Layer by clicking on ![]() .
.
Center map
The map can be re-centered to the selected image location by clicking on the "Location button (![]() )" from the KartaView panel. This feature is useful when the map was moved and the selected image location is not visible on the map.
)" from the KartaView panel. This feature is useful when the map was moved and the selected image location is not visible on the map.
Image web page
The selected image web page can be opened by clicking on the "Globe button (![]() )" from the KartaView panel.
)" from the KartaView panel.
Change the current photo format to front-facing or wrapped when available
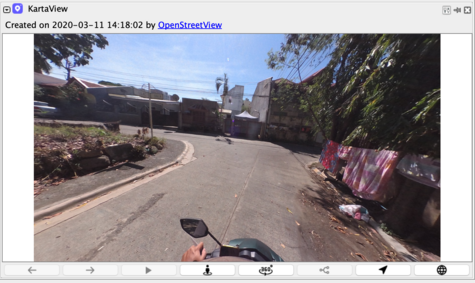
The format of the photo loaded in the panel can be changed by clicking the switch button.(![]() - for visualising the wrapped format or
- for visualising the wrapped format or ![]() - for visualising the cropped format).
- for visualising the cropped format).
Edge layer
The Edge layer loads data automatically: In the case of OSM data layers the data is loaded only for the downloaded area.
Map View
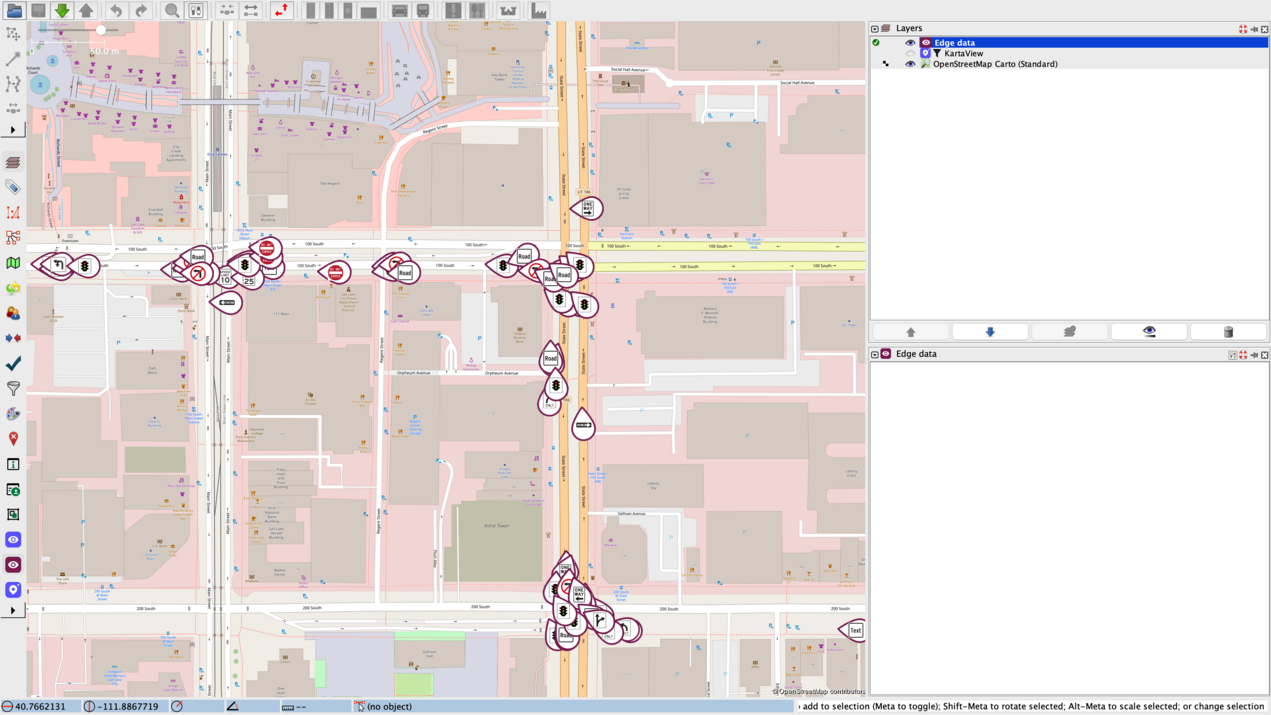
Edge layer data is displayed starting with zoom level 17:
Sign edge detections are represented using self-describing icons.
Data filtering
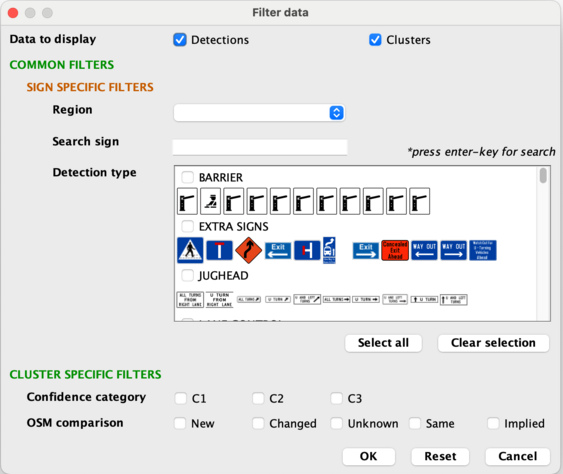
The displayed data can be filtered based on multiple criteria. Filters can be accessed by right clicking on Edge data layer -> Filter data menu item.
You can filter the sign edge detections by the following criteria:
- Data to display: the types of data which can be visualised in the map (Detections, Clusters)
COMMON FILTERS
- SIGN SPECIFIC FILTERS
- Region — show detection and cluster types corresponding for a region
- Search sign — the desired sign to find
- Detection type — a list of all available detection types
CLUSTER SPECIFIC FILTERS
- Confidence category — the value (C1, C2, or C3) which the data should have
- OSM comparison — show detections based on comparison with OSM data (New, Changed, Unknown, Same, Implied)
Edge data panel
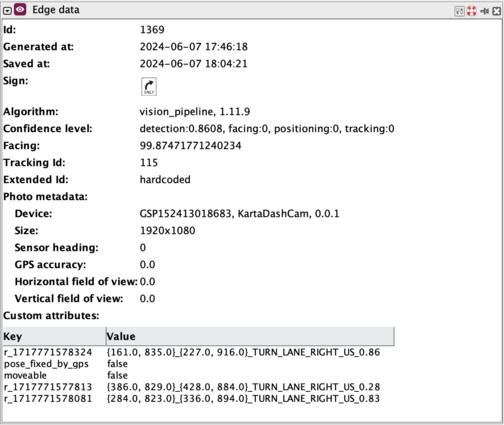
The Edge data panel displays the currently selected edge detection metadata.
Preference settings
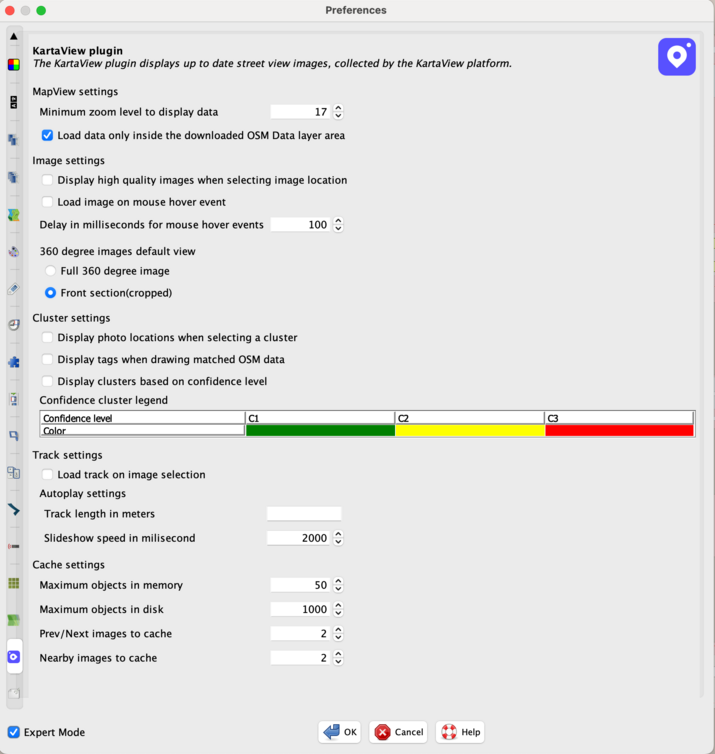
The KartaView plugin can be customized from the plugin's preference settings. The preference settings can be accessed from JOSM->Preferences->KartaView plugin or from the KartaView/Edge data panel by clicking on the preference icon.
MapView settings
The type of data displayed on the MapView can be customized by modifying the following settings:
- minimum zoom level for displaying individual image locations - by default image locations are displayed starting with zoom level 17.
Image settings
Regarding image loading the user can customize the following settings:
- load high quality images - if this option is selected then the high quality images are loaded instead of a large thumbnail. By default this option is disabled
- load image on mouse hover event - if this option is enabled then the small thumbnail is loaded on mouse hover events. A better resolution image is loaded if the user clicks on the image location icon or if the KartaView panel is maximized. This option is not compatible with the other options and it is enabled only if the previous two image customization options are unselected
- choose between visualising wrapped or front section(cropped) format of a photo
Cluster settings
- display photo locations when selecting a cluster
- display tags when drawing matched OSM data
- display clusters based on confidence level
Track settings
- load corresponding track - if this option is selected then also the track corresponding to the selected image is loaded and displayed on the map. By default this option is enabled.
- track length - for how many meters should the auto play function run
- slideshow speed - the wait time before the next photo is loaded during auto play
Cache settings
Individual images are loaded in the background and are cached. We had adopted caching in order to be able to display faster the image corresponding to a selected location.
When an image is selected the previous, next and nearby images are loaded in the background and saved into the cache. If the user unselects the image then the irrelevant images are removed from the cache.
The following settings can be modified:
- maximum number of objects to keep in memory
- maximum objects to keep in disk
- previous and next images to cache
- nearby images to cache.
Development
The KartaView plugin is under development. We are working on fixing bugs and also adding new functionality from time to time.
The source code of the currently released plugin can be found on GitHub .
Other sources
- https://web.archive.org/web/20180711092427/http://blog.improve-osm.org/en/2018/04/new-version-of-openstreetcam-josm-plugin-with-sign-detections/
- https://web.archive.org/web/20201118160323/http://blog.improve-osm.org/en/2017/05/openstreetcam-josm-plugin-new-features/
- https://web.archive.org/web/20170716204837/http://blog.improve-osm.org/en/2017/02/openstreetcam-josm-plugin/
