FR:OpenStreetBrowser/Howto Categories
Cette page explique comment créer vous-même une catégorie pour OpenStreetBrowser.
Enregistrer un utilisateur sur OpenStreetBrowser Development
Allez sur le site https://www.openstreetbrowser.org/dev et enregistrez un nouvel utilisateur. Connectez-vous au site.
Créez un nouveau dépôt
Cliquez sur le symnbole "+" en haut de la page:
[[File:OSB-howto-categories-2.png|thumb|Remplir l'information du dépôt]
Fournir de l'information au sujet du nouveau dépôt
Important: Cocher la case "Initialiser ce dépôt avec les fichiers sélectionnés et le modèle". Sinon il s'agira d'un dépôt neuf et vous devrez "pousser" un dépôt Git existant ici.
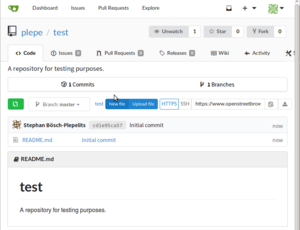
La page principale de votre dépôt
Vous êtes sur la page principale de votre dépôt. Vous pouvez identifier tous les fichiers dans le dépôt (actuellement seulement README.md).Ici se trouvent des liens où les "Issues" et les "Pull requests" peuvent être discutées. Mais cela peut être intéressant plus tard.
Créer un nouveau fichier
Cliquez sur "New file".
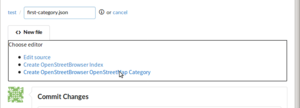
Choisir un nom de fichier et le type d'éditeur
- Choisir un nom de fiochier et ajouter l'extension ".json", ex. "première-catégorie.json".
- Cliquez sur "Create OpenStreetBrowser OpenStreetMap Category".
Entrer dans lms données de catégories
[TRADUCTION EN COURS - 21.03.2018]
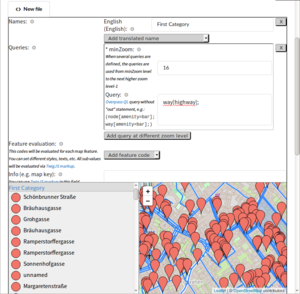
- Start with the category name. You should at least enter an English name, but you can add the name in several languages. If your language is not listed, please create an Issue on https://github.com/plepe/openstreetbrowser/issues.
- Now the difficult part starts: Enter an Overpass QL Query without header and the
outstatement. Overpass is a database for OpenStreetMap with a special language. In the example in the screenshot I entered a really simple query:way[highway];which queries all highways (in the current viewport). If you want only residential highways, you would useway[highway=residential]. If you want several tag values you need a regular expression, e.g.way[highway="^(primary|secondary|tertiary)$"]. If you want objects from several keys you can use a union:(node[highway=crossing];node[amenity=toilets];). - You might want to add additional queries at different zoom levels. E.g. On lower zoom levels (e.g. 14 and 15) you want only primary and secondary highways and on higher zoom levels (16 and above) you would include tertiary and residential. Click on "Add query at different zoom levels".
- If you did everything as described above, you should now see something in the preview window as in the screen shot.
- Now for the interesting part ;-) Evaluate and style the map features. Click on "Add feature code". Here you can define how each individual map feature which is loaded from Overpass will be interpreted. E.g. with "title" you can define how to object is listed (also the title of the popup). Each of the fields can contain TwigJS (a template language) code.
- From "Add feature code" choose "style". This defines how the map feature is displayed on the map.
Now there should be another drop-down labeled "Add element", where you can choose certain parameters, e.g. 'color', 'width', 'text', ...
- In the example I changed the following parameters:
- color:
#ff0000, which is red in hexadecimal.
- text: Use the tag value "name" from the map feature to label the way:
{{ tags.name }}.
- width: Depending on the type of the highway use different width.
- As I said, every item in "feature code" can contain TwigJS code. E.g. You could use it to use different colors depending on the maxspeed.
The possibilities are endless :-)
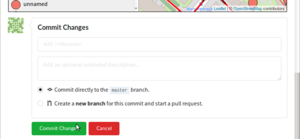
Save category
Scroll down to the bottom of the page and click "Commit changes".
Open category on main OpenStreetBrowser
Go to https://www.openstreetbrowser.org/ . Click on "More categories". Locate your repository (it should be listed on top, as they are sorted by the newest change). Click on your category. Share the link (you could remove the "map=x/y/z" part of the URL) :-)


